 Some photos cry out to be seen. But there seems to always be something you can do with the photo to make it an outstanding painting. I have begun to paint my Utah collection and THIS image spoke to me.
 The long line is rising...drawing your eye into the picture. The shorter line points out late afternoon light which creates nice contrast and long shadows. Can this picture be kicked up a notch? I think so.

My first act was -create a color scheme.
Go to http://www.colorschemedesigner.com/ to find strongly compatible colors. In Photoshop, I choose a dominate color in the picture with the eyedropper and enter the color picker. Copy the hexadecimal number (Ex: da8860) and enter Color Scheme Designer...paste in the box "Enter the RGB Value". Revealed is the complement, triad, tetrad of that original (in this case reddy orange color). For landscapes with skies, photorealistic paintings always need 3 basic color hues.
I have long been a lover of skies and have collected many MANY over the years. I selected this one for Bryce Canyon.

All I needed to do was greatly expand it, change its colors to match my color scheme and flip it over horizontally so the light came in from the right direction.
There is no yellow green in the color scheme, so I coaxed the greens into more bluegreen and put dark tones of blue into the shadows. As always I eliminated detail from the photo using the plugin Topaz Labs\Topaz Simplify 3 from http://www.topazlabs.com/
 Time to enter Painter. 1. Painting Rock: Don't use clone color; vertically scrub each rock with Acrylic\Opaque Brush Detail 5 4 33 55 0 2 Color Variability=1 4 4 Pick up a different rock color for each rock.
 2. Then use clone color with Brushes\SableChiselTipWater 4 36 0 28 0 to smooth the texture.
Using these brushes, I consolidated the colors in the rock.
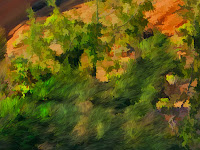 Needle Trees are a bit more tricky!
 Sometimes the leaves are in the right spot. BUT if not, here's how to add needles.
1. First blow leaves on with Karen Sperling\SperlingFoliage1 14 70 10 39 .88; save this & clone again to add needles (you’ve got to MAKE leaves in the right spot before you turn them into needles)
2. Then use TreesnBranches\highlightBranches 14 100 37 84 0 Angle=Squeeze 34 Angle 290 Expression Source and scribble the leaves to make needles.
The bottom is done, the top green leaves are yet to become needles!
MY TRICK: Both rocks and trees are done with TWO brushes. The first lays the foundation, the second polishes the product.
Here's a view of the finished product.

Many of the pictures in this gallery... Computer Art-Woodland Photos
uses the same trick. Do something, THEN undo it selectively.
uses the same trick. Do something, THEN undo it selectively.