 Here is the photo that I transformed into the digital painting on the right ; I found interesting these unique rocks (like stacked pancakes) at Zion National Park.
1. My first act with EVERY picture is to create a color scheme. You'll recall from Blog 9... I use http://www.colorschemedesigner.com/
to find strongly compatible colors.
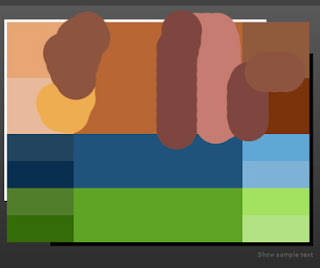
 In Photoshop, I choose a dominate color in the picture with the eyedropper and enter the color picker. Copy the hexadecimal number (Ex: b27b71) and enter Color Scheme Designer...paste in the box "Enter the RGB Value". I usually use the triad of the original color...print screen and copy the clipboard to a file which you see here. The blobs of color are my additional choices from the picture; these 21 colors will be the basis of my colorset.
2. My workflow's next step: eliminating detail from a photo by using the Photoshop plugin from Topaz Labs...Topaz Simplify 3 from http://www.topazlabs.com. I spend more time setting up the photo in Photoshop than I do painting it once I set it up. I want the light to come in from the right angle...the contrast to show what the subject is...the picture to have a certain "feel" .
3. In Painter 12 I experiment until I decide on brushes that will transform the picture. Notice the detail I keep on each image!!! I always keep track of what brush was used for a feature. A quick review of Blog 8 will remind you WHY!!! I want to be able to recreate the exact brush even if I crash my machine...lose all my brushes...or am gone for a huge computer painting absence. (which obliterates my memory completely)
4. This picture shows the effect of using the Acrylic\Opaque Brush to scrub the detail out of the rock with a sweeping motion. Each rock was painted with a chosen color, not a clone color.
Compare the original Zion with an area showing scrubbed rock. There is certainly no "photo" left when this treatment is complete.
MY TRICKS:
- Spend a lot of time setting up the picture and THEN paint it.
- Scrub the detail out of a rock to give a painterly effect.
- Always keep complete info on the brushes used to create the image.
Take a look at the images in "Painting Utah's Photographic Landscapes". All 16 of the images followed the same workflow as Zion. See you in 6 months.


